Fix the Steelseries Arctis Pro GameDAC Game unavailable error
Inhaltsverzeichnis
1. Preface Inhalt
It has been some time since I bought the Steelseries Arctis Pro (wired) together with the GameDAC amplifier thingi. All in all, I’m very happy with it, as the surround mode is ok-ish, the microphone is quite good, and they have (imo) the most easy-to-understand software support I’ve seen so far. Also, I like that you could use the headset with a 3.5mm cable only, but I’m just using it for games, not travel or anything.
If you have the GameDAC connected via USB, it would register three audio devices with Windows:
- GameDAC Game (Speakers)
- GameDAC Chat (Speakers)
- GameDAC Chat (Microphone)
All modern headsets do it like this, as you can now use separate devices for in-game sound and your Teamspeak or whatever. The GameDAC allows you to blend over between these two sound sources, e.g. to mute annoying and chatty teammates on the fly 🙂
Unfortunately, after resuming from hibernate or stand-by, my indows installation would often only recognize the GameDAC Chat , but not the GameDAC Game speaker device anymore. This happens on all Windows 10 versions I tested, 1809 and above.
Reddit has some posts about it, but no fix. So, do read on.
2. Solution Inhalt
Let’s look at the solution I found. To be complete, replugging the GameDAC USB cable after Windows is booted, would cause headset devices to be recognized completely and all is well again – until the next standby. But this is cumbersome and in no way worthy of an engineered solution. Well, here goes…
2.1 Theory Inhalt
Acutally, it’s quite easy. Replugging things is usually a good idea, and fortunately, with the GameDAC USB devices you can do that virtually. You just need to disable them, wait a few seconds and enable them again. And this task can be automated upon each login into windows as well.
2.2 Download and install Nirsoft USBDeview Inhalt
The only tool you need is Nirsofts USBDeview from this website. Just download it and place it into a folder of you choice. Assuming you’re running an x64 build of Windows 10, download the 64-bit version and place it in Program Files in a separate folder, e.g. C:\Program Files\NirCmd . You should have these files in there:
- USBDeview.chm (help file)
- USBDeview.exe (tool we need)
2.3 Find the USB device Instance ID for your GameDAC Inhalt
Now, we need to find out a unique identifier for your GameDAC device. This can be done with the tool you just installed. Just launch USBDeview.exe and wait for it to list all the devices you have or had connected you computer. You’ll see a window like this:
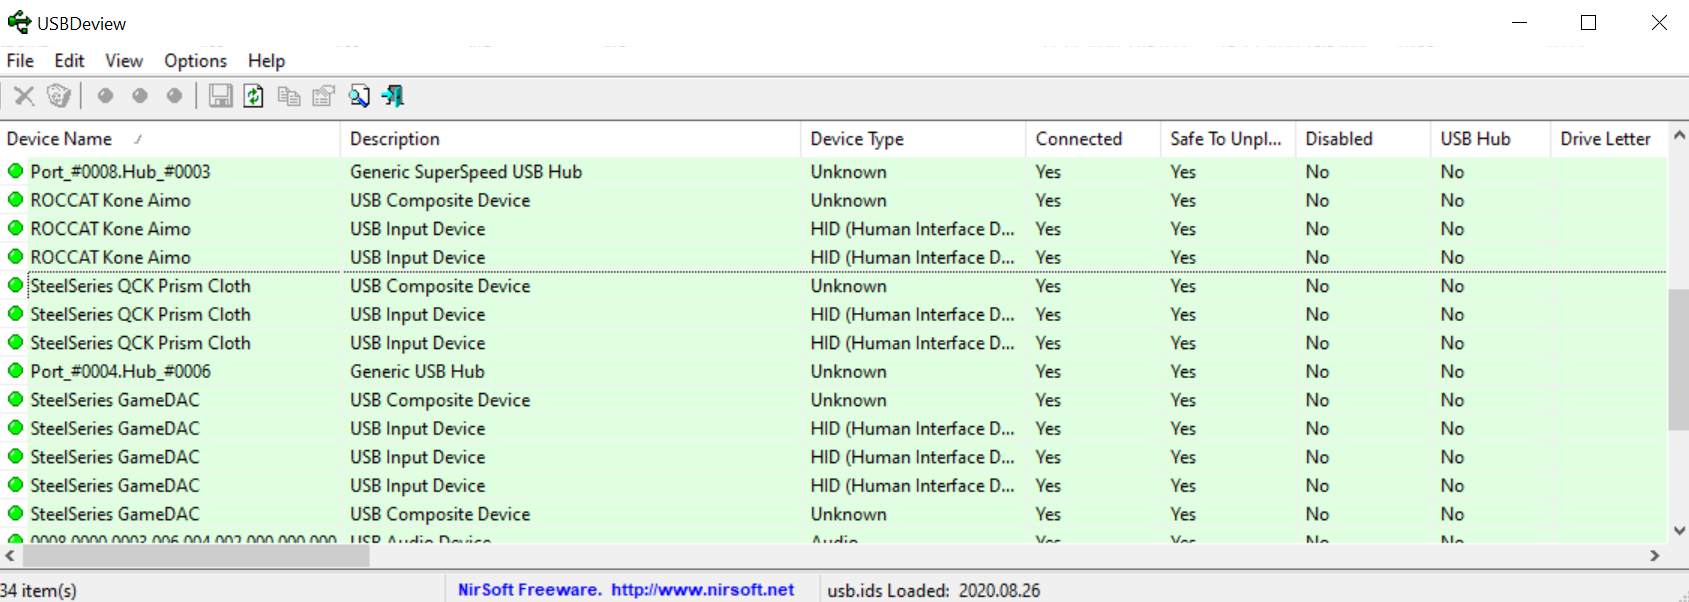
We want the entry with GameDAC Game, obviously. This is a bit hidden, just scroll to the right, more precisely, the column „Friendly Name“. There, you can find the GameDAC Game entry line.
Double-click the line to open the properties window:
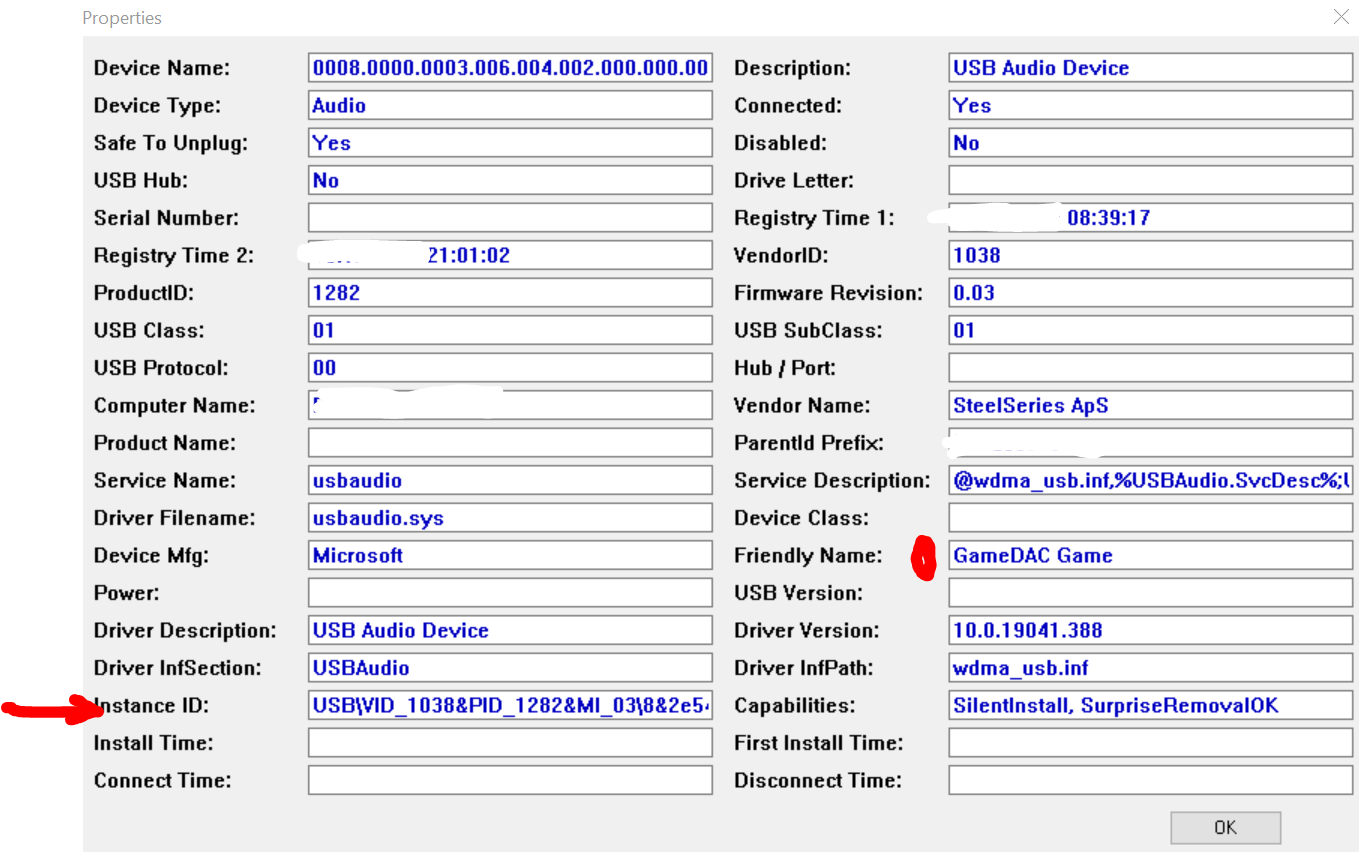
Make sure it’s the GameDAC Game device (see Friendly Name in the right column) and copy the Instance ID string.
2.4 Create a batch file to automate things Inhalt
With that information, you can create a batch file, for example in the same folder: c:\Program Files\NirCmd\replugheadset.bat
Use the following content, replace the Instance ID (USB\… ) with your own and save the file:
@echo off
echo Headset UNPLUG
"c:\Program Files\NirCmd\USBDeview.exe" /RunAsAdmin /disable "USB\VID_1038&PID_1282&MI_03\8&12345678&0&0003"
echo wait...
timeout /t 10
echo Headset PLUG
"c:\Program Files\NirCmd\USBDeview.exe" /RunAsAdmin /enable "USB\VID_1038&PID_1282&MI_03\8&12345678&0&0003"
Note: the batch file needs to be run ad administrator.
It simply disables the GameDAC Game, waits a few seconds and re-enables the device. The wait period seems important, USBDeview’s own disable & enable command did not work on my setup.
2.5 Create a task to apply each time you log in Inhalt
In case you want it run each time you log in, simply create a new task with runs this script as administrator and is triggered by a login of any user. Also, you can of course place a shortcut to the file on your desktop.
Hope it helps.
Bislang keine Kommentare vorhanden.
Einen Kommentar hinterlassen