Amazon ALEXA Lists Exercise – Put’em on Paper…
4.2 Amazon ALEXA custom printer skill
Now it becomes a bit trickier. Bear with me, the ALEXA skill is not exportable as source code, so, we’re walking through the process via screenshots.
4.2.1 Creating the Custom Skill
- Navigate to your Amazon Developer Console
- Press „ALEXA“
- Select „Your ALEXA Dashboards“ top right and go to „ALEXA Skill Kit“
- Now, add a new skill and follow the screenshots:
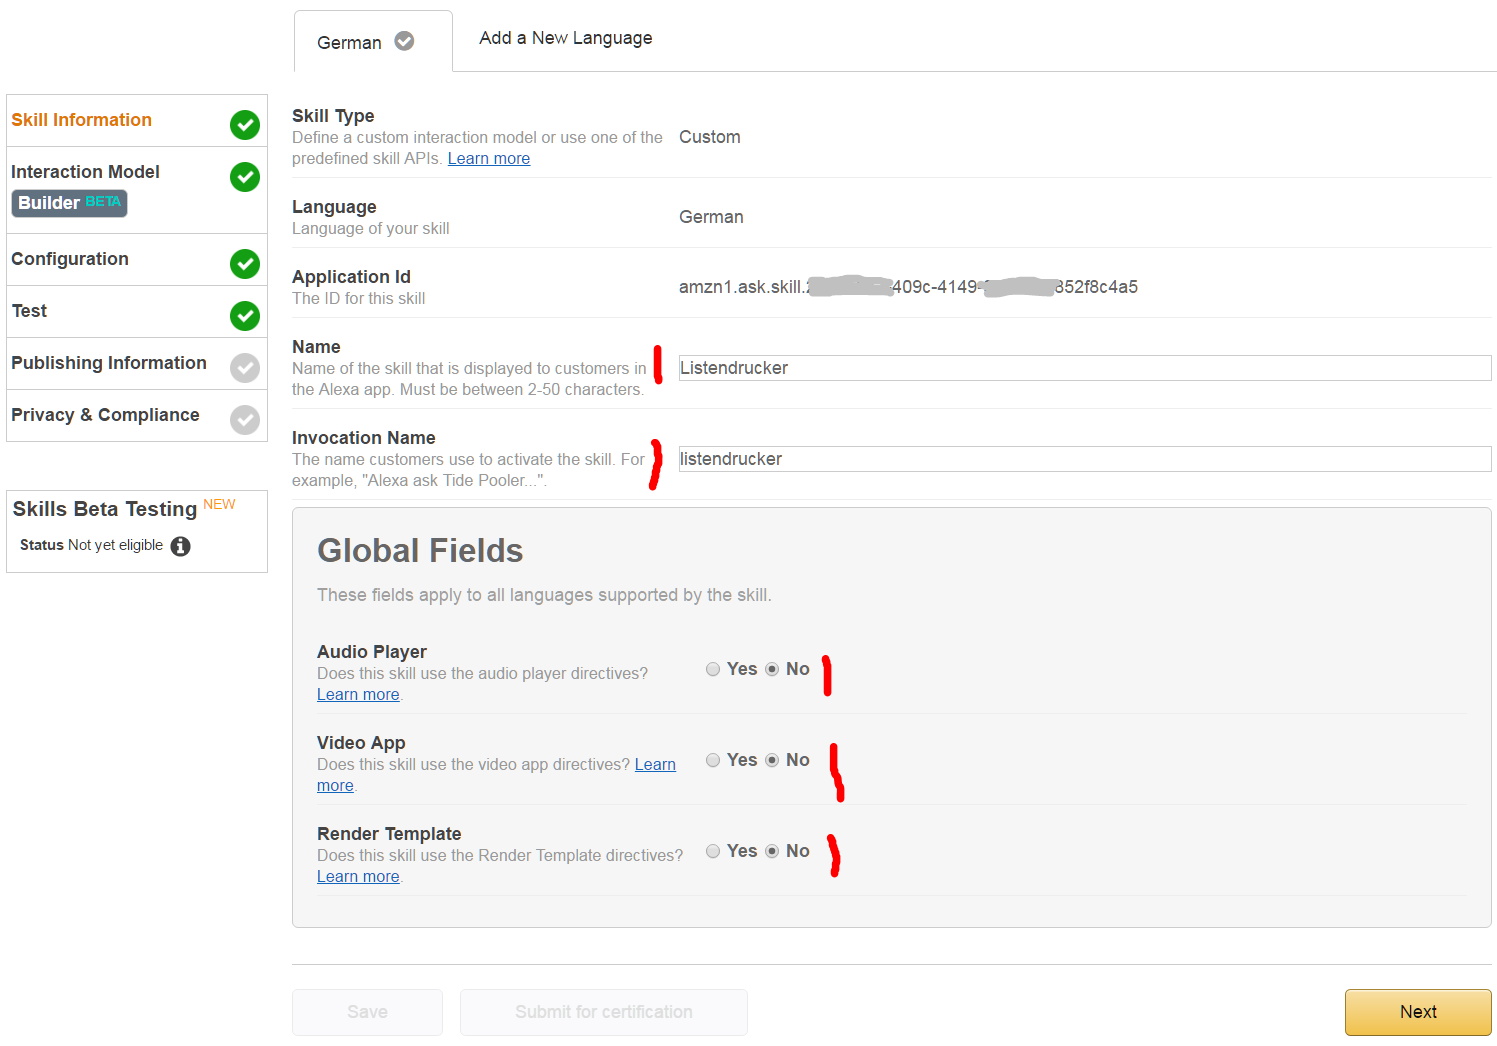
Choose a name to be displayed in the ALEXA App and an invocation name. I chose a very simple „list printer“.
Now, here comes a tricky part: you need to create a voice model with a single intent named default and two slots named listName and deleteFlag .
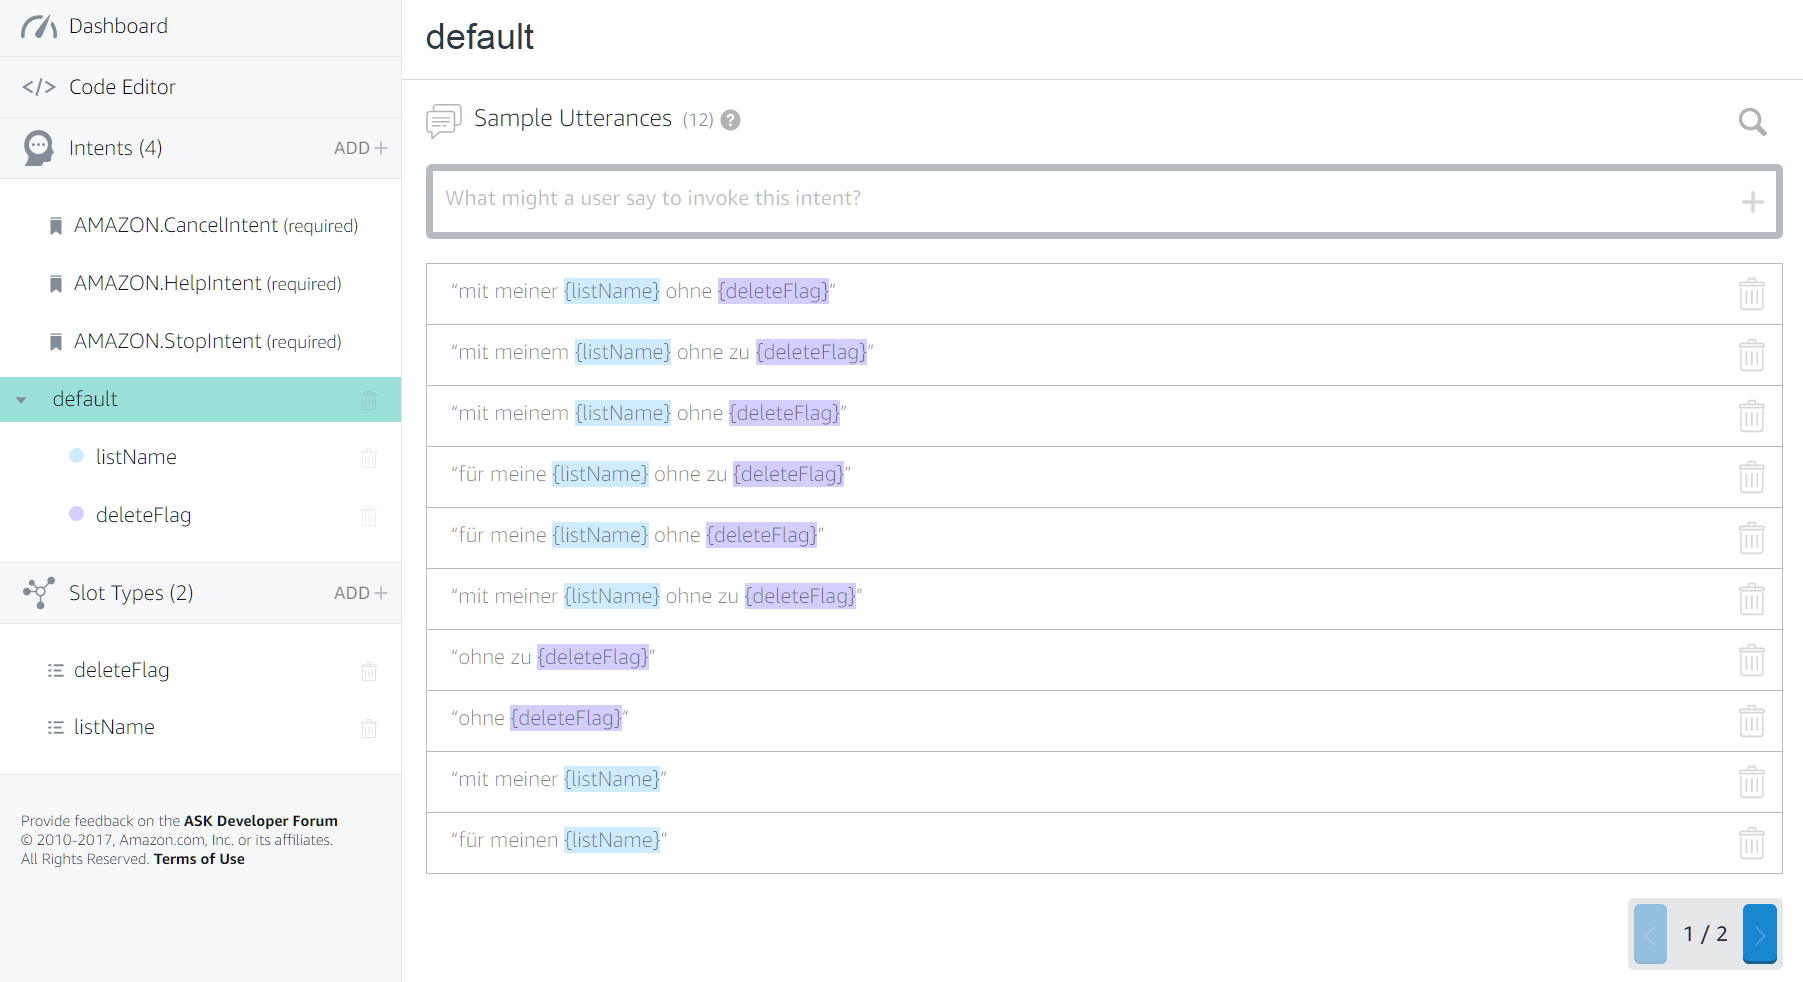
In the Screenshot, I’ve used German text, but the theory is simple. Your voice model should cover any variants of:
- „Alexa, launch list printer for my shopping list [without deleting]“
- „Alexa, launch list printer [without deleting]“
In the slot deleteFlag and equally named slot type we would put any variant of deleting: e.g., „clearing“, „emptying“, „deleting“, „removing“.
In the slot listName and equally named slot type we would put any variant of the lists names: e.g., „shopping list“, „grocery list“, „todo list“, „to do list“ and so on.
The python code uses listName to determine which list you want printed (defaulting to „shopping list“) and uses just the binary deleteFlag to determine whether or not to clear the list after successful printing.
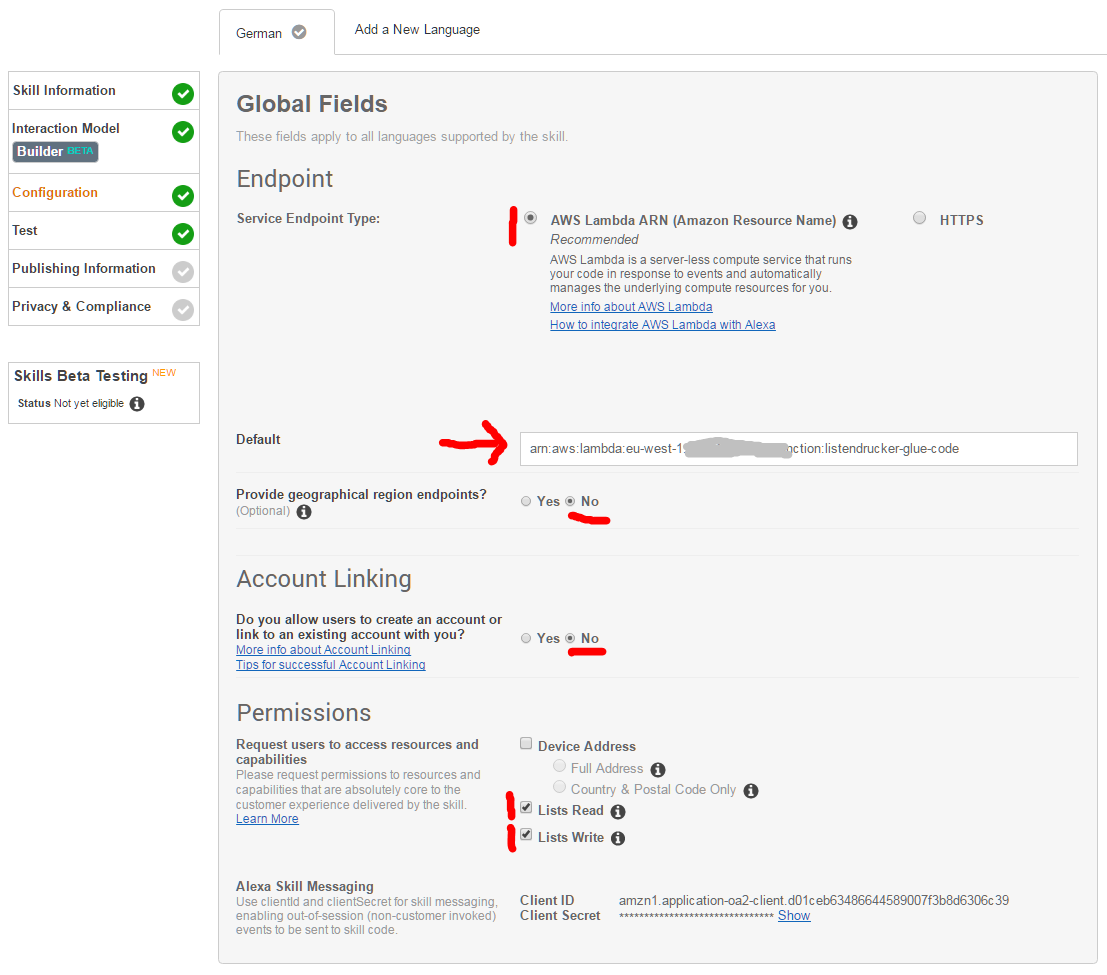
Last but not least before testing – configure the skill as shown above. Of course, insert your own ARN from your python function from above here.
Upon saving it should give you a success message. If there is an error, make sure you assigned ALEXA skill kit as a trigger source to the python function above.
Now, navigate to the Test-Tab and make sure that the testing switch is on.
4.2.2 Granting access to your version of the Custom Skill
- Open your ALEXA app on your cell phone
- Open the three bar menu,
- navigate to „Skills“ and press „Your Skills“ in the top right corner,
- Select the name you have chosen above,
- Press the button labeled „settings“,
- Press „manage“,
- Set both switches („read lists“, „write lists“) to on,
- and press „Save“.
That should be all.
5 Kommentare zu “Amazon ALEXA Lists Exercise – Put’em on Paper…”
Hi,
great post.
Could please tell which thermal printer you have used?
The amazon link isnt‘ working anymore.
Thanks
hi, Thanks. The one I used isn’t available on Amazon anymore, but any USB receipt printer should work… Just look for what mike24’s ESC/POS library is supporting and buy one of those models… Best, Christoph
Thanks for the reply. This product list on github helps a lot.
One further question: Could you really delete the original shopping list with the skill? In your video you use the original „Einkaufsliste“ so you could also delete this one per API? In your code for the lambda it is „shopping list“ and not the original code snipped?
Danke und Gruß
Tom
hi, well, the Einkaufsliste is used by the ALEXA language model. it translates into „shopping list“ in the skill. Therefore the difference… Cheers.
Hello!
Nice work ! I try to integrate it to home assistant .
Your video link is dead could you update it please?
regards
Ben
Einen Kommentar hinterlassen